Getting Started with Jenkins: Installation and Setup Guide

Introduction
Jenkins is a helpful tool that makes it easier to build, test, and deploy software. It is widely used by people working in DevOps. With Jenkins, you can automate many tasks related to software development. Here are some examples:
Continuous integration (CI): Jenkins can automatically build and test your code whenever you make changes. This helps ensure that your code is working correctly and catches any errors early on.
Continuous delivery (CD): Jenkins can also automatically deploy your code to a production environment. This ensures that your code is always available to users and reduces the risk of deploying faulty code.
Continuous monitoring: After deployment, Jenkins can monitor your software to make sure it's running smoothly. This helps identify and fix any problems quickly.
Using Jenkins can make your software development and deployment process more efficient and reliable. It's a great tool for anyone looking to improve their DevOps workflow.
Understanding the Workflow of Jenkins
Jenkins operates by organizing a sequence of tasks known as a pipeline. Each task represents a step in the process of building, testing, and deploying your software. These tasks can include activities such as running unit tests or deploying code to a production environment.
When setting up a pipeline, you have the flexibility to define the order in which tasks should be performed. Additionally, you can specify the specific parameters that need to be provided for each task.
Once you have established a pipeline, Jenkins will automatically execute it whenever you make changes to your code. This ensures that your code remains functional and aids in the early detection of any bugs or issues.
How to Use Jenkins
Jenkins provides flexibility in terms of installation options. You can choose to use Jenkins as a Docker image or install it directly on your system. Let's explore both methods:
Using Jenkins as a Docker Image:
Jenkins is available as a Docker image, which allows you to easily run Jenkins in a containerized environment. By using Docker, you can quickly set up and manage Jenkins instances.
To use Jenkins as a Docker image, you need to have Docker installed on your system. Once Docker is installed, you can pull the Jenkins Docker image from the official Docker Hub repository.
After pulling the image, you can create a container and start Jenkins with the necessary configurations.
Running Jenkins as a Docker container offers benefits such as isolation, portability, and ease of scaling.
Installing Jenkins directly:
Alternatively, you can choose to install Jenkins directly on your system. Installing Jenkins directly involves downloading and installing the appropriate package for your operating system.
By installing Jenkins directly, you have more control over the configuration and can take advantage of system-level features and integrations. It allows you to run Jenkins as a service on your machine, making it easily accessible and manageable.
Installing Jenkins directly on your system provides flexibility in terms of customization and integration with other tools and services.
Advantages of using Jenkins as Docker:
No need to separately install Java or other dependencies, as the Jenkins Docker image comes preconfigured with all the necessary components.
Advantages of directly installing Jenkins:
Greater control over the configuration, allowing customization and integration with system-level features and tools without relying on the constraints of a containerized environment.
Hands-On Demo on Starting Jenkins
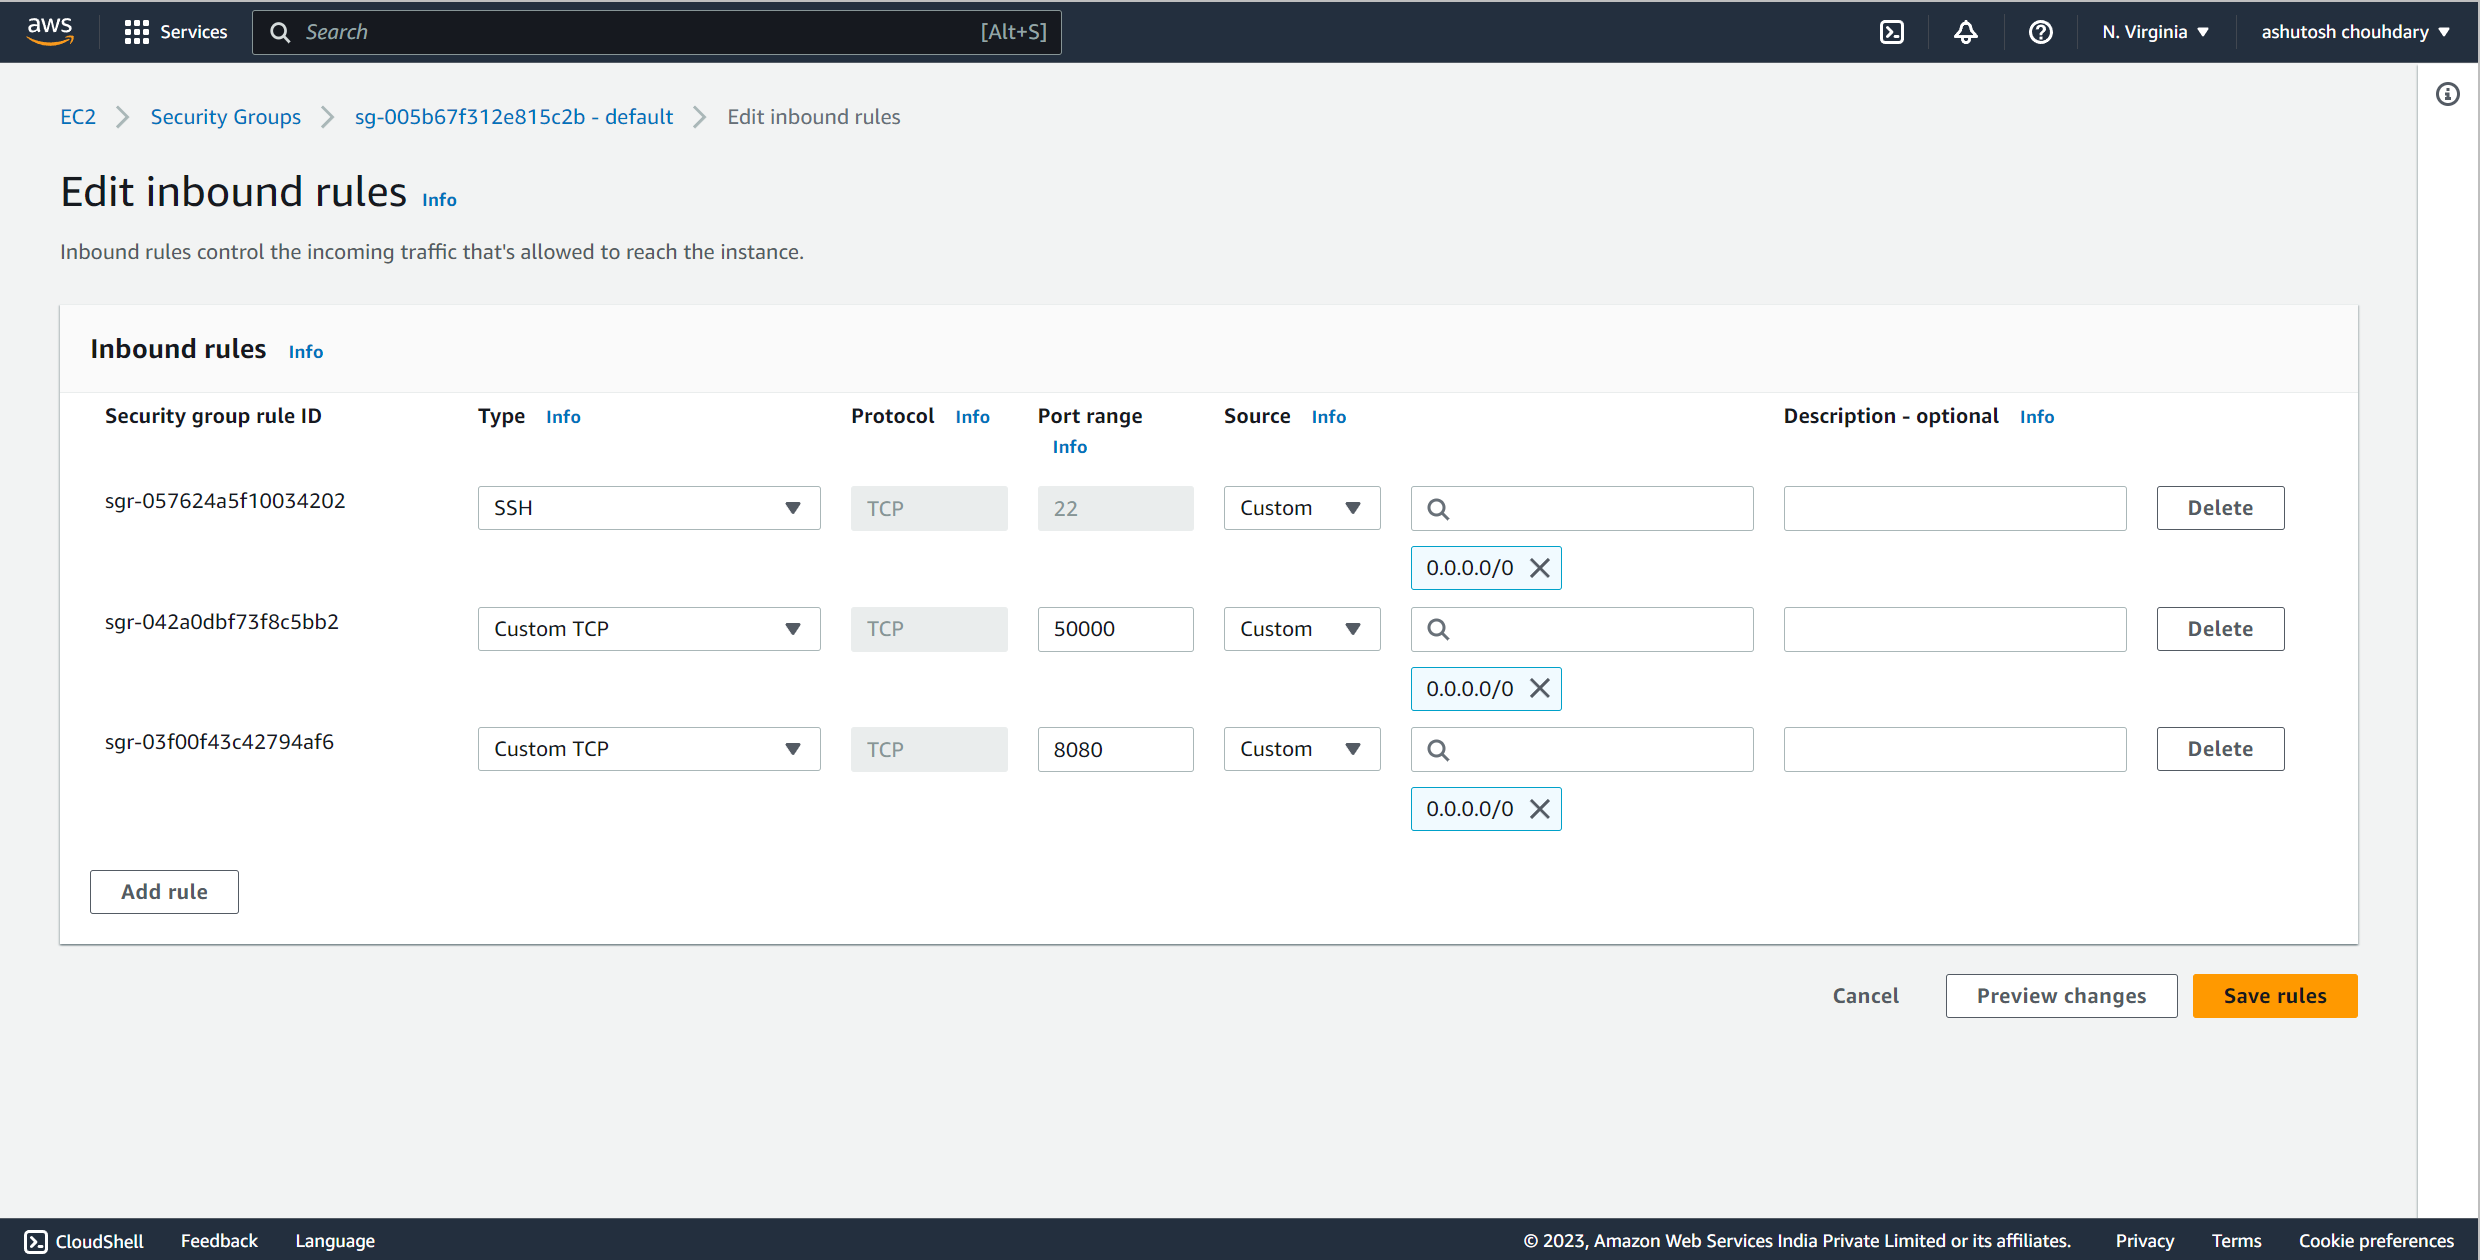
Step 1: Create an AWS EC2 instance to host Jenkins. Ensure that ports 8080 and 50000 are allowed in the security group settings to enable access to Jenkins.
Step 2: Create a file named
jenkins-docker-compose.ymland add the following content:version: '3' services: jenkins-container: image: jenkins/jenkins:lts ports: - 8080:8080 - 50000:50000 volumes: - jenkins-volume:/var/jenkins_home volumes: jenkins-volume: driver: localThe
version: '3'line specifies the version of the Docker Compose syntax being used.Under the
servicessection, we define a service calledjenkins-containerthat represents the Jenkins instance.image: jenkins/jenkins:ltsspecifies the Docker image to be used for the Jenkins container. In this case, we are using the latest LTS (Long-Term Support) version of the Jenkins image available from the official Jenkins Docker Hub repository.The
portssection maps the container ports to the corresponding ports on the host machine. Port8080is mapped to port8080, allowing access to the Jenkins web interface, and port50000is mapped to port50000for communication with Jenkins agents.The
volumessection defines a volume namedjenkins-volumethat will be used to persist Jenkins data. It is mounted to the/var/jenkins_homedirectory within the container, which contains Jenkins configuration, plugins, and other important files.The
jenkins-volumevolume is configured with thelocaldriver, which means it will be managed locally on the host machine.
By using this Docker Compose file, you can easily start Jenkins with the specified configuration and ensure that the Jenkins data is persisted across container restarts
Step 3: Run the Docker Compose file to start Jenkins by executing the following command:
docker-compose -f jenkins-docker-compose.yaml up -d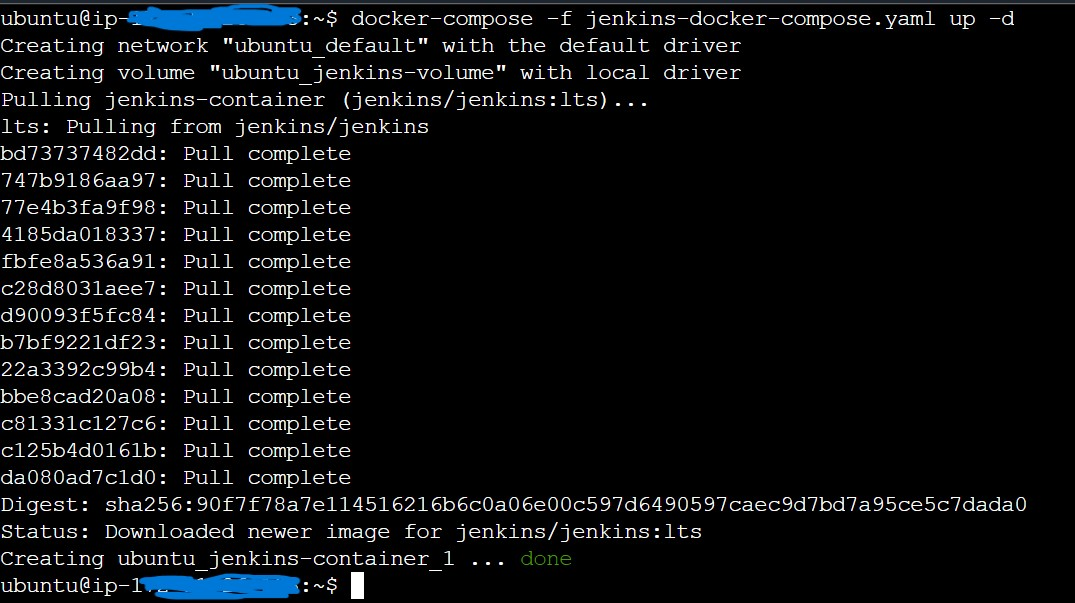
Step 4: Access Jenkins on port 8080 through the public IP address of your EC2 instance. Open a web browser and enter
http://<public-ip>:8080
Step 5: Retrieve the initial admin password. You can choose one of the following methods:
Accessing the Jenkins Container:
Run the following command to enter the Jenkins container:
docker exec -it <container_id> /bin/bashReplace
<container_id>with the actual ID or name of your Jenkins container.Once inside the container, navigate to the following folder:
cd /var/jenkins_home/secrets/Copy the password from the file located in this folder.
Accessing the Jenkins Host Directory:
As we have mounted the Jenkins volume on our host, you can directly access the password file from the host machine.
Open a terminal or command prompt on your EC2 instance.
Navigate to the directory where you mounted the Jenkins volume.
Copy the password from the file in that directory.
Note: Ensure to replace <container_id> with the actual ID or name of your Jenkins container and adapt the path to the mounted volume according to your specific setup.
Step 6: Install the necessary plugins as prompted by Jenkins. Select the suggested plugins or choose your own based on your requirements.

Step 7: Set up the admin user for Jenkins by providing the necessary details
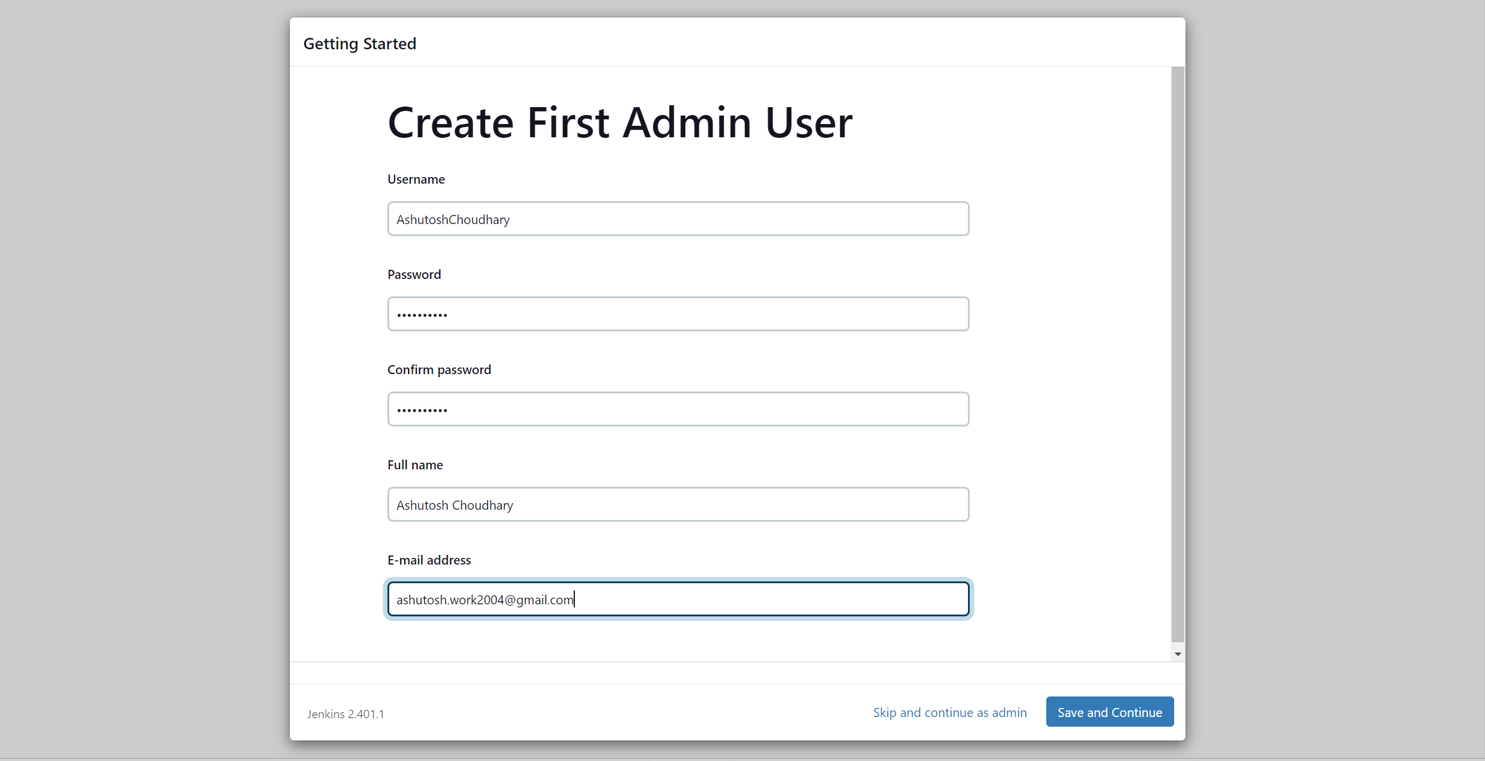
Congratulations! You have successfully started Jenkins, and now you can begin automating deployments and other software development tasks using Jenkins.

Conclusion:
In this blog, we learned about Jenkins and its advantages in automating software development and deployment. We explored two methods of using Jenkins: as a Docker image and by installing it directly. Through a hands-on demo, we successfully started Jenkins, accessed it, retrieved the admin password, installed plugins, and set up the admin user. In the next blog, we will delve deeper into Jenkins and explore advanced features to enhance our DevOps workflow. Stay tuned for more in-depth insights on Jenkins.


